A quote tells your customer what you plan to charge before you do the work. Follow the steps below to create a draft quote that you can review and send when you are ready.
Before you begin
You will need:
- Permission to create and manage invoices, which also covers quotes. If the Create Quote button is greyed out, ask your organization's administrator.
- A customer. You can add one while you create the quote, or see Add a customer first.
Step 1: Open a new quote
In the header, click Quotes, then click Create Quote. You can also open a customer's profile and click New quote.
The Draft Quote page opens. If your organization has a default quote template, the form starts from that template. To start from a different template or a blank quote, use the Template menu at the top of the page. See Managing and using quote and invoice templates.
Step 2: Choose the customer
In the Prepared for section, click Search customers… and type the customer's name. Select the customer from the list.
If the customer is not in the list, click Create new customer, enter their Legal Name and contact details, and click Save.
Step 3: Check the quote details
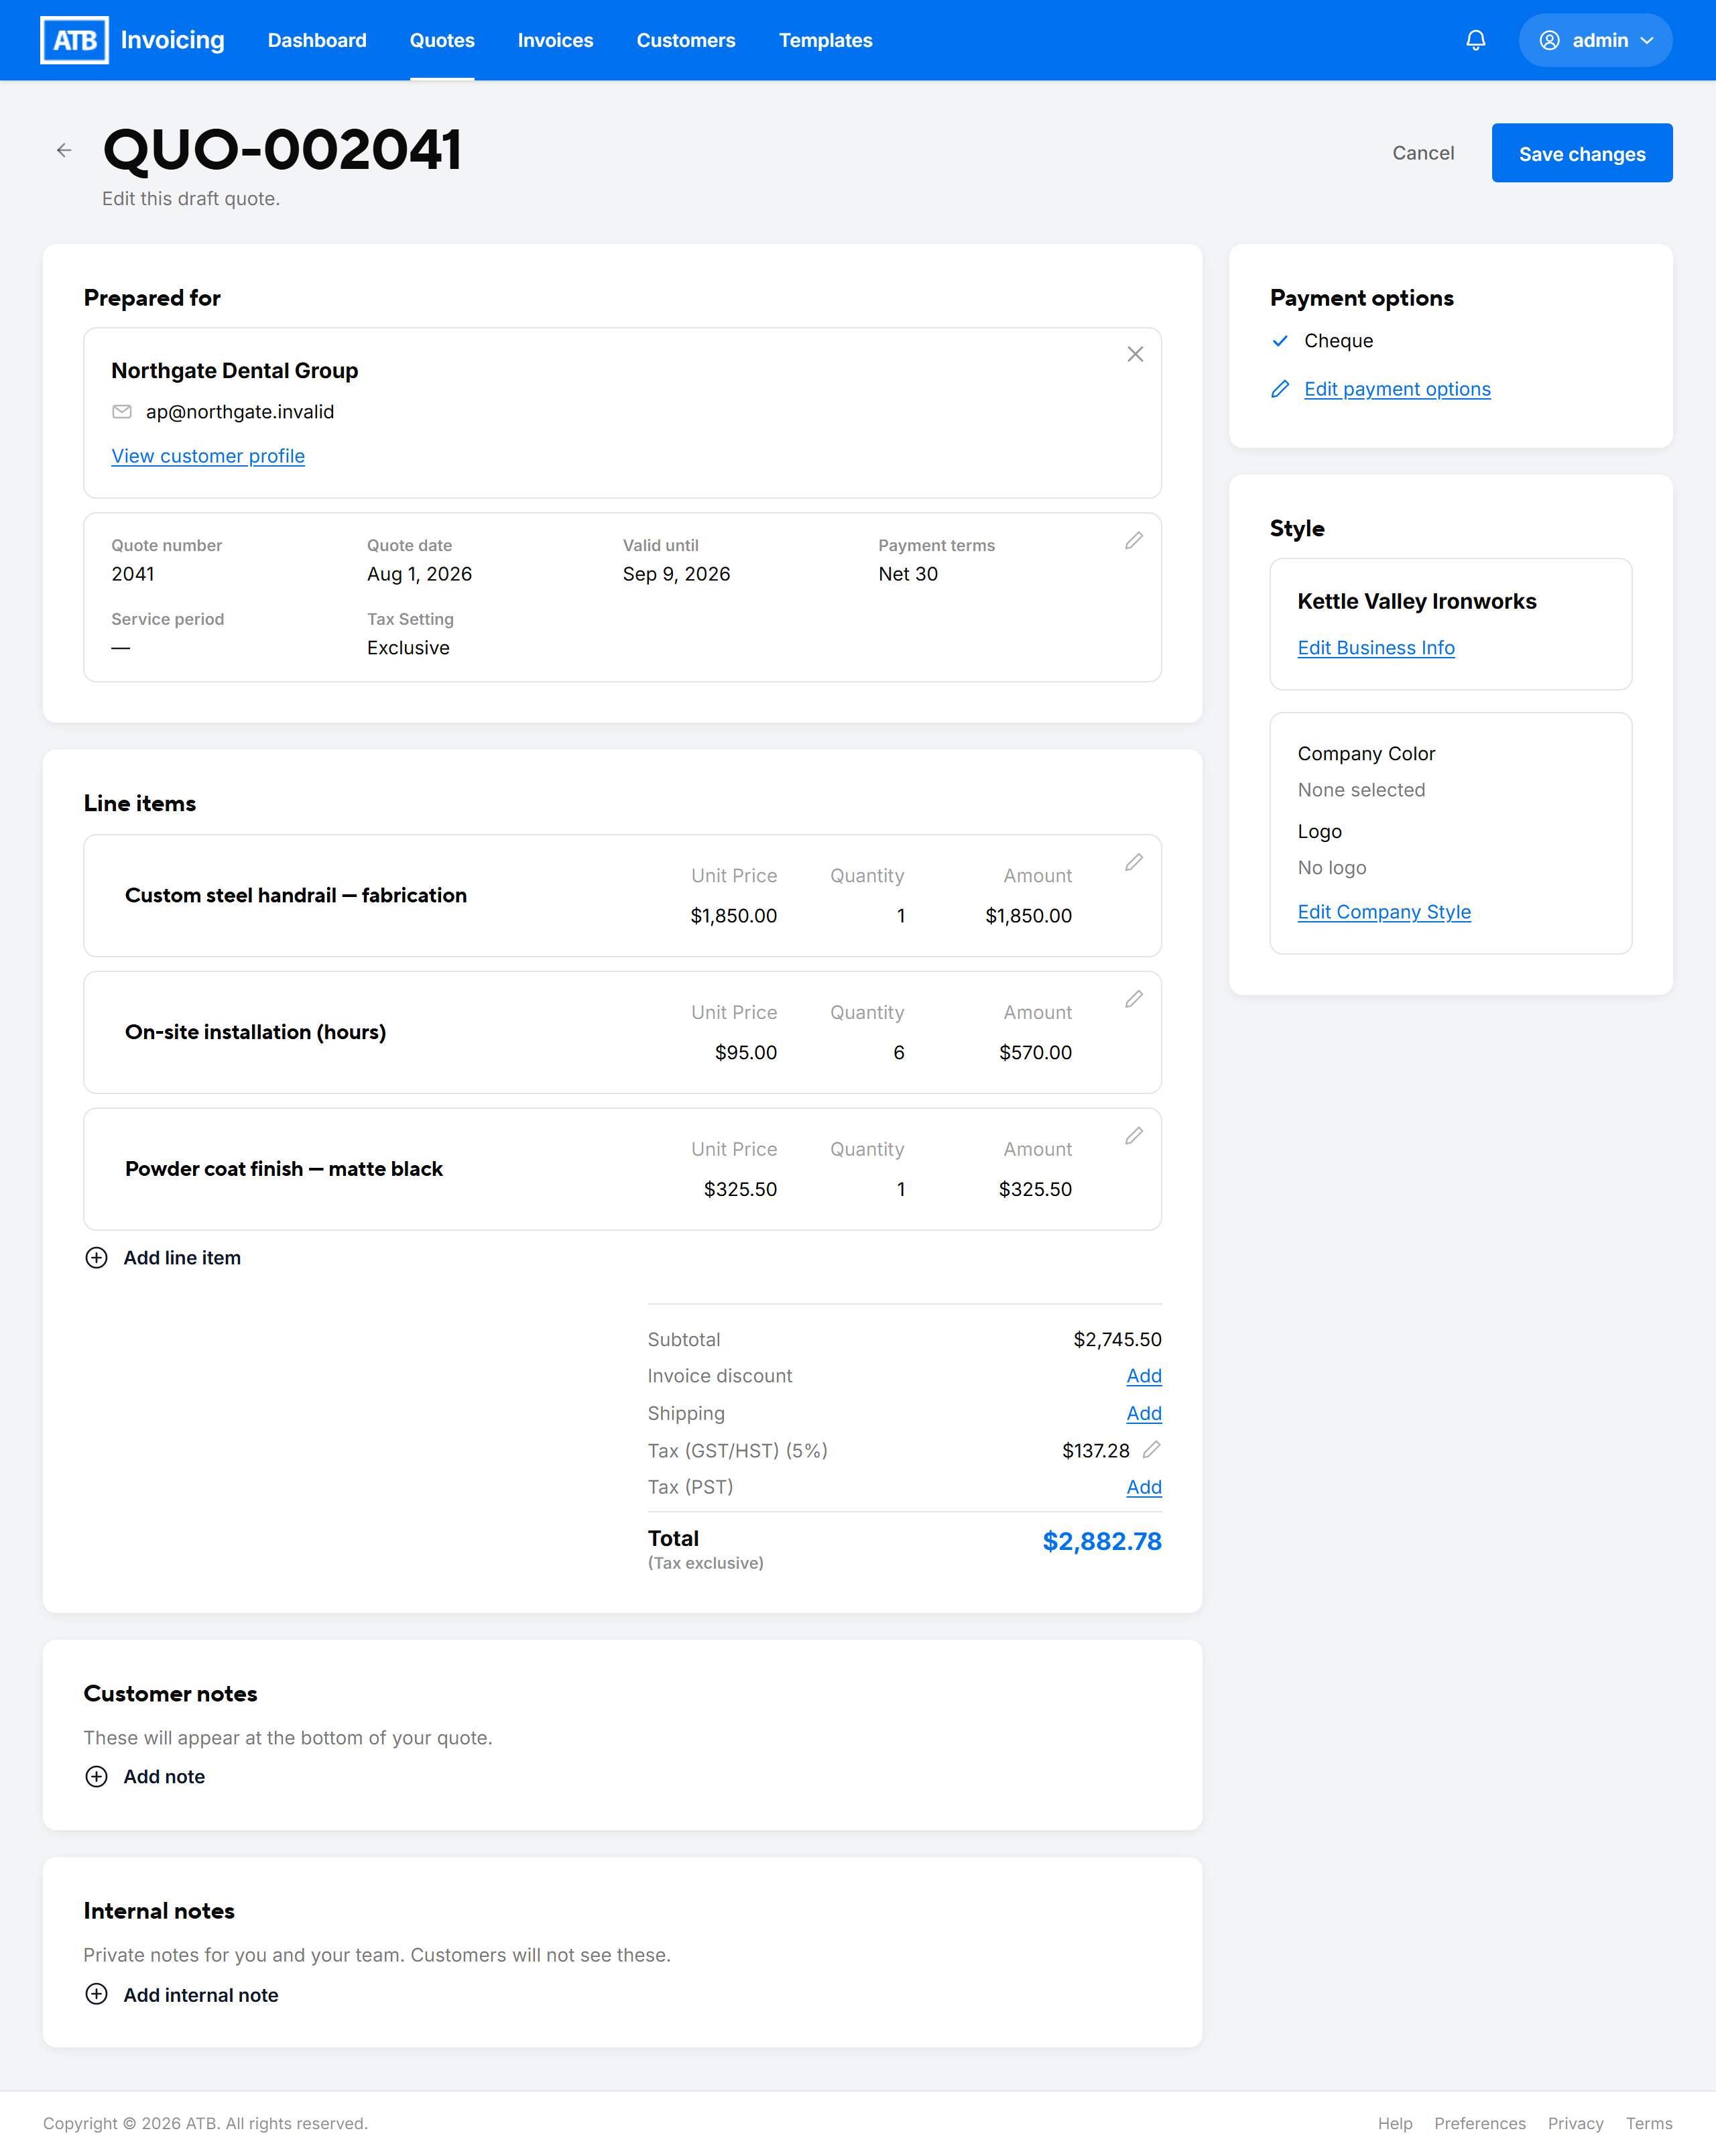
The Prepared for section summarizes the quote details. To change them, click the summary to open Edit Details:
- Quote number — ATB Invoicing proposes the next available number after the QUO- prefix. You can enter any positive whole number that is not already in use.
- Quote date — defaults to today.
- Valid until — the date the quote expires. It defaults from the customer's quote expiry setting, or your organization's default (30 days unless you changed it). The date cannot be in the past. Clear it if the quote should not expire.
- Anticipated service dates — optionally enter a Service start and Service end date for the work.
- Tax Setting — choose Exclusive to add tax on top of your prices, or Inclusive if your prices already include tax.
Click Save to close Edit Details. The summary also shows the Payment terms that apply if the quote becomes an invoice. They come from the customer's settings or your organization's default terms.
Step 4: Add line items
The first line item opens for editing automatically. For each item you are quoting:
- Enter a Description, a Unit price, and a Quantity.
- Optionally, select Add tax to set a GST/HST (%) and PST/QST (%) rate for that item only.
- Click Add or Update.
To add another item, click Add line item. The summary below the line items shows the Subtotal, taxes, and Total. To add or change tax for the whole quote, click Add or the pencil icon beside Tax (GST/HST) or Tax (PST).
Step 5: Add notes (optional)
- Customer notes appear at the bottom of the quote your customer sees. Use them for scope, assumptions, or exclusions.
- Internal notes are private notes for you and your team. Customers do not see them.
Step 6: Choose payment options
The Payment options section lists the payment methods for this quote, preselected from the customer's payment preferences. To change them, click Edit payment options, select the methods you want, and click Save.
Note. A quote must include at least one payment method. If none is selected, you see Select at least one payment method before continuing.
Step 7: Save the draft
Click See Preview. The quote is saved with the status Draft and its page opens. Nothing is sent to your customer until you send it. See Sending and resending an invoice or quote.
When your customer accepts the quote, you can turn it into an invoice. See Converting quotes to invoices automatically.
Common issues
The See Preview button is greyed out.
Choose a customer, select at least one payment method, and make sure every line item has a description and a quantity greater than zero. If a line item is still open for editing, click Add or Update to finish it.
"The valid-until date can't be in the past." appears.
Open Edit Details and choose a Valid until date of today or later, or clear the date.