Every quote and invoice in ATB Invoicing is addressed to a customer. Follow the steps below to add a customer and fill in the details that appear on your documents.
Before you begin
You will need:
- Permission to create and manage clients. If the New Customer button is greyed out, ask your organization's administrator. See Managing administrators and sub-users.
Step 1: Open the new customer form
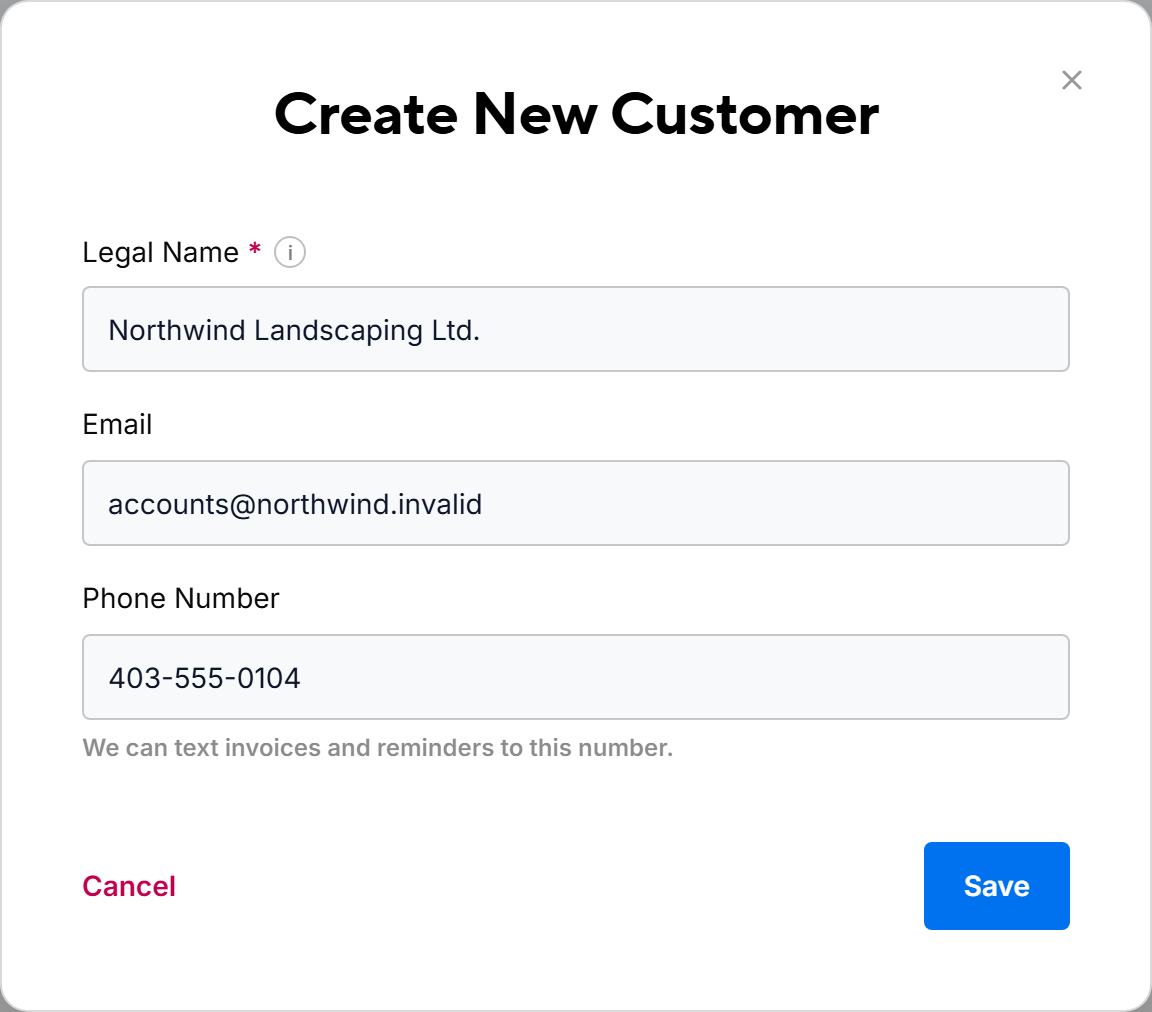
In the header, click Customers, then click New Customer. The Create New Customer window opens.
You can also add a customer without leaving a quote or invoice. In the Bill to or Prepared for section, open the customer search and click Create new customer.
Step 2: Enter the customer's details
- In Legal Name, enter the full legal name of the business or individual. This is the only required field.
- Optionally, enter an Email. Quotes, invoices, and receipts you send by email go to this address.
- Optionally, enter a Phone Number. ATB Invoicing can text invoices to this number.
Tip. Add at least an email address or a phone number. You need one of them to send quotes and invoices from ATB Invoicing.
Step 3: Save the customer
Click Save. The customer's profile opens.
If you already have a customer with the same name or email, a warning appears instead. Check whether you meant to use the existing customer. To create a separate customer anyway, click Create anyway.
Step 4: Add more details (optional)
The Customer Details panel on the profile lets you add more information. Click a section to add it:
- Add Business Details — update the legal name, email, and phone number.
- Billing Address — the street address, city, province, postal code, and country that appear on your documents.
- Add Contact Info — a contact person with their own email and phone number. Invoices and texts go to the contact instead of the main email and phone.
- Shipping or Service Address — use this if the work or delivery address differs from the billing address.
- Add Internal Notes — private notes for your team. Customers do not see them.
- Add Tags — labels that help you group and filter customers.
Step 5: Set customer defaults (optional)
Click the Customer Settings tab to set defaults for this customer:
- Default Settings — for example, Payment Terms and Quote Expiry. By default, each setting follows your organization's defaults.
- Payment Preferences — the payment options that are preselected when you create a quote or invoice for this customer.
Common issues
The Save button is greyed out.
Enter a Legal Name. If you entered an email or phone number, check that it is valid.
"You already have a customer named..." appears.
A customer with the same name or email already exists, possibly archived. Open the existing customer from the Customers list, or click Create anyway to add a separate customer. See Why can't I find a customer?.