The Invoices page lists every invoice in your organization, so you can find one quickly and act on several at once. Follow the steps below to search, filter, sort, and manage your invoice list.
Before you begin
You will need the View invoices permission to see the list. Actions that change an invoice, such as sending or marking it paid, need the Create and manage invoices permission.
Step 1: Open the Invoices page
Click Invoices in the top navigation. The page shows 25 invoices at a time, newest invoice date first. From here you can also click Create Invoice or Export CSV.
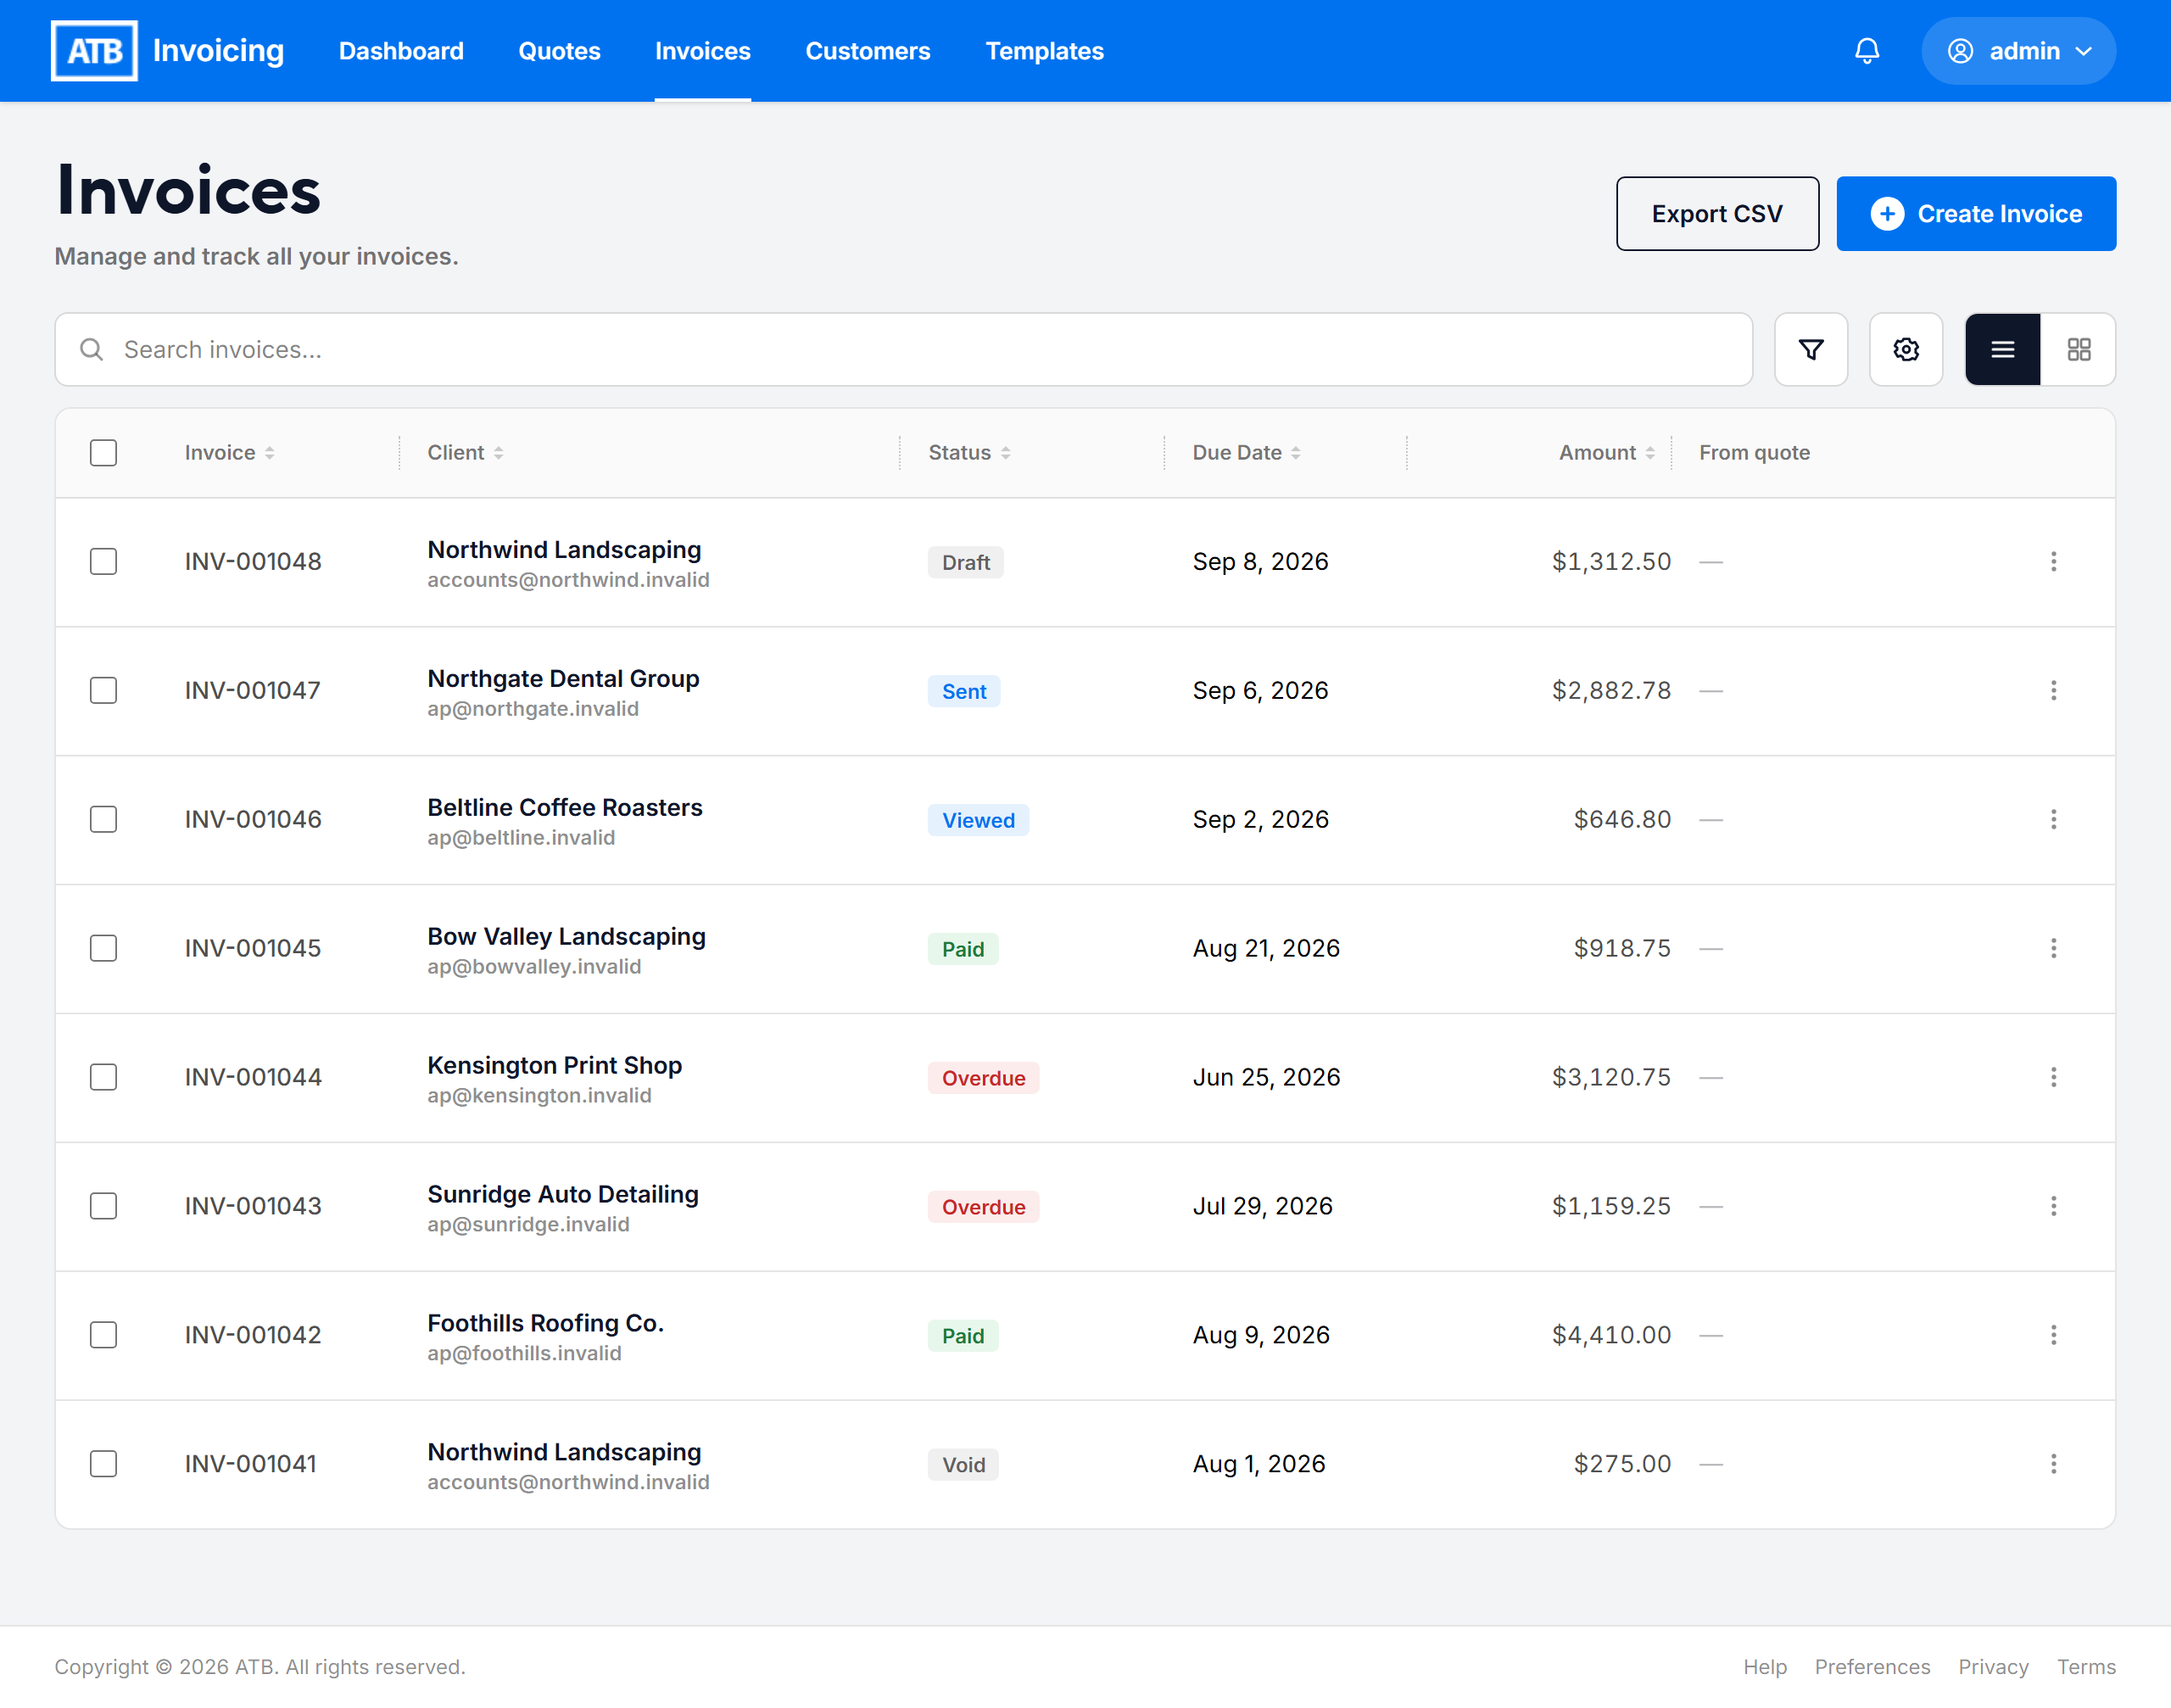
Step 2: Search for an invoice
Type in the Search invoices box. The list updates as you type and matches:
- Customer name and email address
- Contact name and contact email address
- Text in the invoice's customer notes
- Invoice number
Tip. To search by invoice number, type the digits only. For example, type42to find INV-042. Searching forINV-042with the prefix does not match.
To clear the search, click the x in the search box.
Step 3: Filter the list
- Click the filter button next to the search box.
- In the Filters panel, choose a Status: All Statuses, Draft, Scheduled, Sent, Viewed, Paid, Overdue, Uncollectible, or Void.
- Optionally, choose a Date sent range: This Month, Past 30 Days, Past 60 Days, Past 90 Days, Past 6 Months, or Custom.
- Click Apply Filters.
Active filters and searches appear as chips above the list. Remove one chip, or click Clear filters to reset everything.
An overdue invoice appears under both Sent (or Viewed) and Overdue. See Understanding quote and invoice statuses.
Step 4: Sort and arrange columns
- Sort. Click a column heading (Invoice, Client, Status, Due Date, or Amount). Click it again to reverse the order.
- Show, hide, or reorder columns. Click the column settings button next to the filter button. You can also drag a column heading to move it, drag its edge to resize it, or right-click it to hide it.
- From quote. This column links to the quote an invoice was created from, if any.
- Switch views. Use the view toggle to switch between the list and a card layout. On smaller screens, the page always uses cards.
Your column choices are saved in your browser.
Step 5: Act on one invoice
Click an invoice number or customer name to open the invoice. To act without opening it, click the actions menu at the end of the row. The options depend on the invoice's status, for example:
- Edit, Send invoice, or Delete draft for drafts
- Cancel send for scheduled invoices
- Resend invoice, Mark as paid, Mark as followed up, or Void invoice for sent invoices
- Send receipt for paid invoices
- Download PDF, Duplicate, and Save as template for most invoices
Step 6: Act on several invoices at once
- Select the checkbox beside each invoice. Use the checkbox in the header to select every invoice on the page. Your selection is kept when you change pages.
- A bar appears at the bottom showing how many are selected and the actions that apply to all of them, such as Send, Mark as paid, or Mark uncollectible.
- Click an action and confirm.
Note. The bar only shows actions that work for every selected invoice. If an action is missing, one of your selected invoices is in a status that does not allow it. Click Clear to start over.